Distributing SSH keys: using ssh-copy-id, manually, or automated
This article has last been updated at .
When you want to allow public key authentication, you have to first create a SSH keypair. Next step is then the distribution of the public key to the other systems. Let’s have a look at a few options, including using the ssh-copy-id utility.
Option 1: Manually
In the past, you had to log in manually to the new system and do things yourself. Especially if you created your key with a tool like PuTTYgen on Windows. Then you logged in on the other system and created a .ssh directory and the related authorized_keys file. Of course, it was common to forget setting the right permissions, resulting in the authentication failing.
Option 2: Using ssh-copy-id
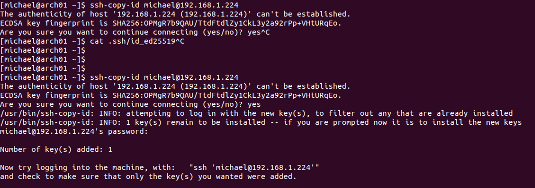
It is much easier to use the SSH utility ssh-copy-id. Just run the tool and provide it with your username on the remote server, with the remote server name.
ssh-copy-id michael@my-server
It will use your local environment to determine the related key(s) and copy it over. In case you use an alternative identity file, you can provide that with the -i option. Same for when running on a different port, specify it together with -p. To simplify your life, set up a ssh_config
file. This way the right username and port are used.

Deploying an SSH key with the ssh-copy-id command
Option 3: Script it yourself
If you don’t have the ssh-copy-id, or using Windows, you have to create something yourself.
The piece of magic needed:
umask 077; test -d .ssh || mkdir .ssh ; cat FILE-WITH-PUBKEY >> .ssh/authorized_keys
This sets your umask, so files created will be with file permission 600, and directories with 700. Then the test function has a look if the .ssh directory exists. If not, it gets created. Last step is adding your key to the authorized_keys file.
Windows
If you are on a system running Windows, use can leverage the plink utility.
type public_identity_string | plink.exe -pw username@hostname "umask 077; test -d .ssh || mkdir .ssh ; cat FILE-WITH-PUBKEY >> .ssh/authorized_keys"
Ensure the right string goes into your authorized_keys file. Otherwise, logging in won’t work.
Bonus option: Fully automated
If you manage a lot of systems, all these steps don’t make sense. It is better to automate the key distribution for users. This way new users get access to the right systems, while old employees have their access revoked at the moment they leave the company.
One of the possibilities to distribute keys is with a configuration management solution, like Ansible, Chef, Puppet, Salt, etc.

