Locking users after X failed login attempts with pam_tally2
This article has last been updated at .
Most Linux distributions use pluggable authentication modules (PAM). This modular type of configuration allows system administrators to configure and fine-tune the authentication of users. It also defines the behavior on specific events, like providing an invalid user account or password. PAM can use these events to automatically take an action, like locking an account.
Introduction to PAM
The configuration of PAM is not that hard, but there are risks involved in the process of making changes. An incorrect change could result in unauthorized users being able to log in, or authorized users to be locked out. So before you deploy any change to your production systems, get familiar with the configuration by using a test system. A virtual machine on your own system could be a great way to experiment safely, allowing you to stay connected via the console.
To measure the number of failed logins per user, a module is needed to do the counting. Two popular modules for this are pam_tally and pam_tally2, named after tallying. This is the process of counting things. By putting such a module into your PAM stack, failed logins can be measures and an action can be taken based upon the score. Let’s have a look on how to configure this measurement.
Differences between pam_tally and pam_tally2
If you never configured a tallying module, we suggest using pam_tally2. This newer version has minor differences with the pam_tally module.
No more: no_magic_root, reset, no_reset
With pam_tally2 these configuration settings have been dropped. If you are migrating, know that some of the options are no longer available.
faillog
The faillog command shows the number of failed authentication attempts per user. For pam_tally2 this command does not work, and the pam_tally2 command itself should used. Use -a to see all users, or -u to specify which user you are interested in.
The modules pam_tally and pam_tally2 both use a slightly different format. For this reason they use different filenames
- /var/log/faillog
- /var/log/tallylog
With these differences in mind, it is time to do some configuration.
Configuration settings
For both pam_tally and pam_tally2 there is the deny option. This specifies the number of bad logins before taking action.
deny=[number]
Another useful setting is unlock_time, a timer before a locked user it automatically unlocked.
unlock_time=[number]
The number of seconds that a particular user can’t log in. If this setting is not used, the account will be locked till an administrative user (like root) unlocks the account.
Using pam_tally2
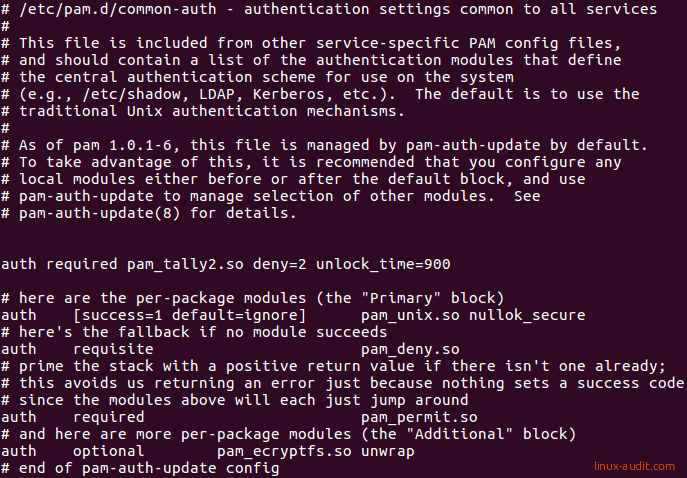
Open /etc/pam.d/common-auth:
Add the following lines before the configuration block starts, so it is the first configuration item.
auth required pam_tally2.so deny=2 unlock_time=900

This change will be active at the very first login attempt. So it is important to test if you can still log in yourself (via console, SSH, or otherwise). With this configured, most likely you also want to count failed login attempts via SSH. To tell the SSH daemon to use PAM, a few options should be enabled. We can see the active configuration with the sshd -T command.
sshd -T | grep -E "(challenge|pam)"
This should at least show usepam yes and challengeresponseauthentication yes to have SSH work together with PAM and the tallying module. Next step is restarting ssh
systemctl restart ssh.service
Finally, open up a second terminal screen and use an incorrect password when logging in via SSH. This should activate pam_tally and increase the failure counter. This can be checked with the pam_tally2 command itself.
pam_tally2 -u username
Resetting locked users on Linux
Users will be automatically unlocked when using a lock time. If you want to enforce this, or unlock a permanently locked user, use the -r option together with the -u option.
pam_tally2 -r -u username

Alternatives to pam_tally2
If you don’t like to fiddle with PAM settings, one of the others options is to use the fail2ban package. This can use the log files of the system to determine incorrect logins and add a system (temporarily) to a blacklist via iptables.
Troubles setting up, or got it running on another Linux distribution? Use the comments and we will update this guide.
